


How to Connect Devices to Home Assistant Using MQTT
This guide uses the PowerUC MCW02-E WiFi Three-Phase Current Monitor to explain how to create a dedicated MQTT user, configure the MCW02-E, add MQTT integration to Home Assistant, and confirm automatic device discovery.
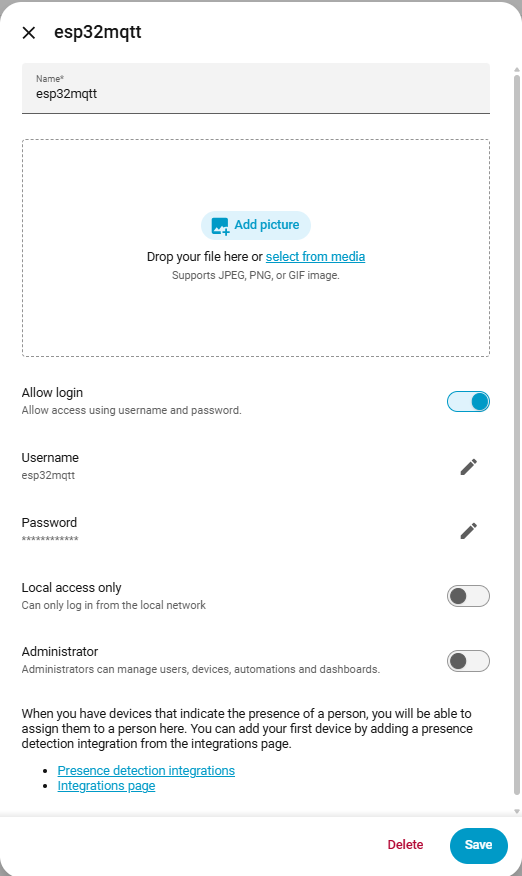
1. Create an MQTT user in Home Assistant
Create a separate MQTT account for the MCW02-E. Using a dedicated account makes access easier to manage and avoids using a Home Assistant administrator account on the sensor.
- Open Settings in Home Assistant.
- Go to People → Users, then choose Add User.
- Enter a name such as
esp32mqtt. - Enable Allow login.
- Set the username and password. Use the same credentials later in the MCW02-E MQTT page.
- Leave Administrator disabled unless there is a specific reason to enable it.
- Click Save.
2. Configure the MQTT server on the MCW02-E
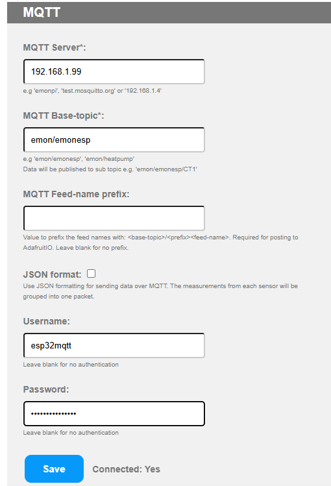
Open the MCW02-E Web interface by entering its IP address in a browser. In the MQTT section, enter the address of the MQTT broker, not the Home Assistant internal service name.
| Field | Example | What to enter |
|---|---|---|
| MQTT Server | 192.168.1.99 | The LAN IP address of the MQTT broker or Home Assistant host |
| MQTT Base-topic | emon/emonesp | A unique topic prefix for this device |
| MQTT Feed-name prefix | blank | Leave blank for the simplest topic structure |
| JSON format | unchecked | Recommended when using Home Assistant Discovery |
| Username | esp32mqtt | The user created in Step 1 |
| Password | your MQTT password | The matching MQTT password |
- Enter the MQTT server address and port
1883. - Enter a unique Base-topic, such as
PowerUC/MCW02-E. - Enter the MQTT username and password created in Step 1.
- Click Save.
3. Add the MQTT integration in Home Assistant
Home Assistant must be connected to the same MQTT broker used by the MCW02-E. If the MQTT integration is already configured, verify its broker address, port, username, and password before continuing.
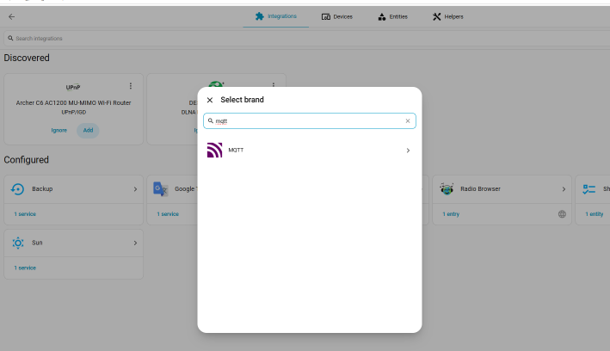
- Open Settings → Devices & services.
- Click Add Integration.
- Search for MQTT.
- Select MQTT from the integration list.
- Enter the MQTT broker host, port
1883, and the MQTT credentials. - Submit the form and wait for the integration to connect.
For the Home Assistant Mosquitto add-on, the broker host shown inside Home Assistant may be core-mosquitto. This is different from the address normally used by an external ESP32 device. The MCW02-E should use the reachable LAN IP address of the broker host.
4. Let Home Assistant discover the MCW02-E
After the MCW02-E connects to MQTT, it publishes Home Assistant MQTT Discovery configuration messages. Home Assistant can then create the device and its entities automatically.
- Return to Settings → Devices & services.
- Wait for the discovered MQTT device notification, or open the MQTT integration.
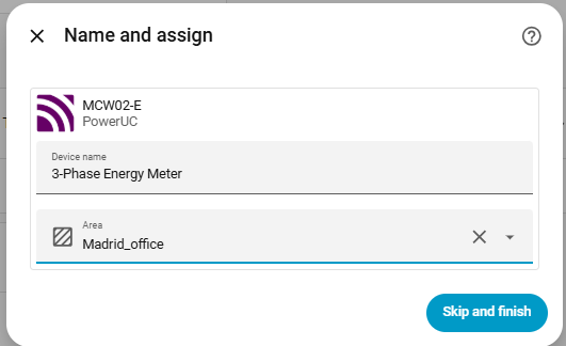
- Select the discovered MCW02-E device.
- Set its area if required, then select Skip and finish or Finish.
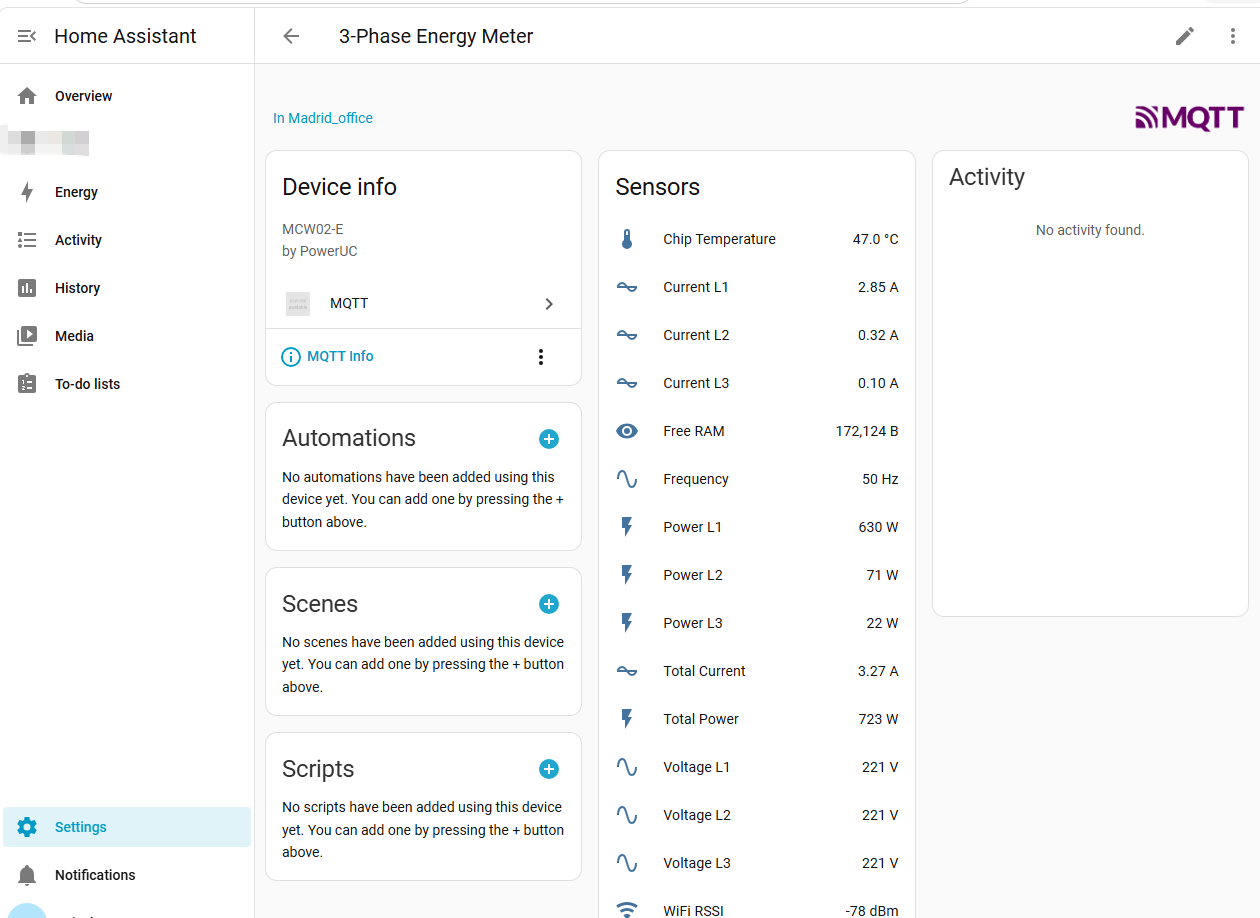
- Open the device page and confirm that the manufacturer is PowerUC and the model is MCW02-E.
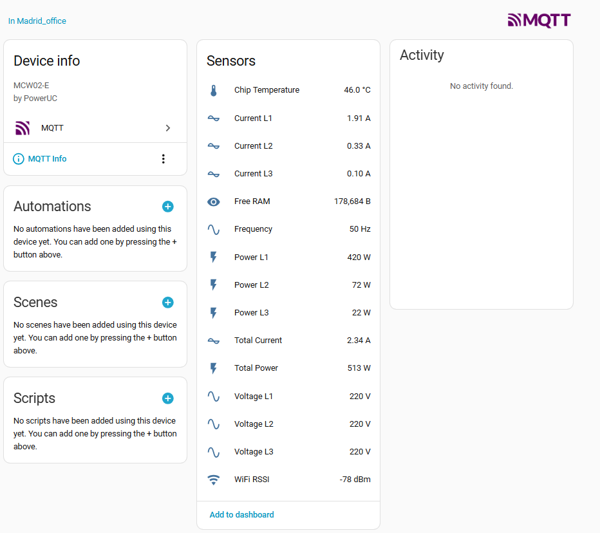
| Entity group | Examples | Unit |
|---|---|---|
| Voltage | Voltage L1, Voltage L2, Voltage L3 | V |
| Current | Current L1, Current L2, Current L3, Total Current | A |
| Estimated power | Power L1, Power L2, Power L3, Total Power | W |
| Other | Frequency, Chip Temperature, WiFi RSSI, Free RAM | Hz, °C, dBm, B |
Verification and troubleshooting
- MCW02-E Web page: MQTT status should show Connected: Yes.
- Home Assistant: the device should appear under the MQTT integration.
- Entities: voltage, current, estimated power, frequency, temperature, RSSI, and Free RAM should report values.
- If no device appears, check the broker IP, port
1883, MQTT credentials, WiFi network, and whether MQTT Discovery is enabled. - Use a unique Base-topic for every MCW02-E to prevent devices from overwriting each other’s state.
Example topics:
poweruc/mcw02e_01/status
poweruc/mcw02e_01/V1
poweruc/mcw02e_01/C1
poweruc/mcw02e_01/Total_PW
Once the device is discovered, add the entities to a Home Assistant dashboard to monitor the three current channels and estimated power in real time.